If you’re seeing this article, it means the Voicemod Driver Audio Cable failed to install or returned an error during setup. Don’t worry — follow this step-by-step guide to manually install the driver and get Voicemod running smoothly.
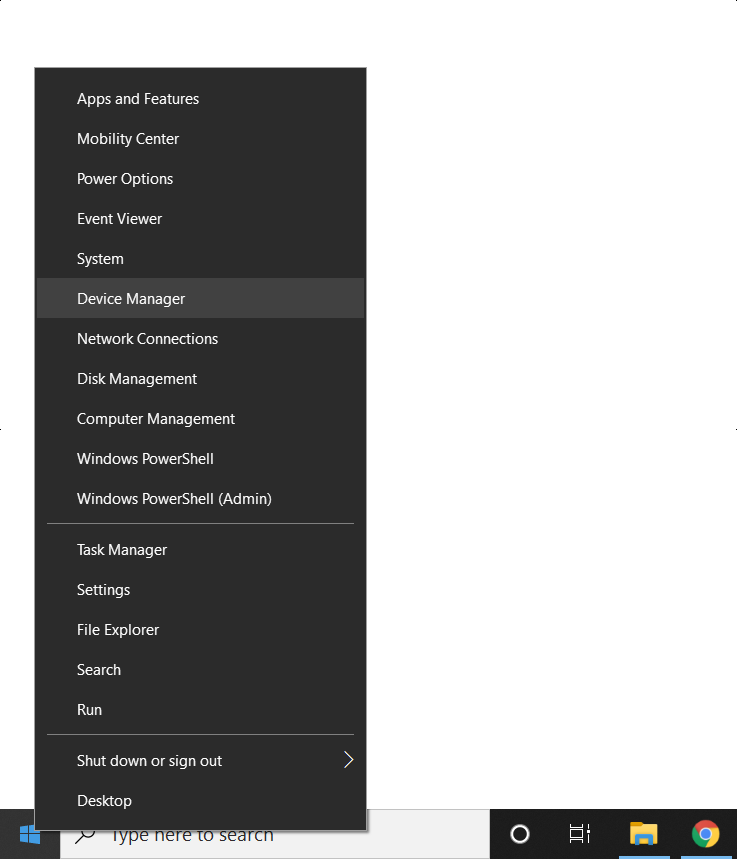
🛠️ Step 1: Open Device Manager
You can open Device Manager in two ways:
Option 1:
-
Right-click the Start button (Windows logo)
-
Select Device Manager
Option 2:
-
Click on the Cortana search bar
-
Type:
devmgmt -
Press Enter
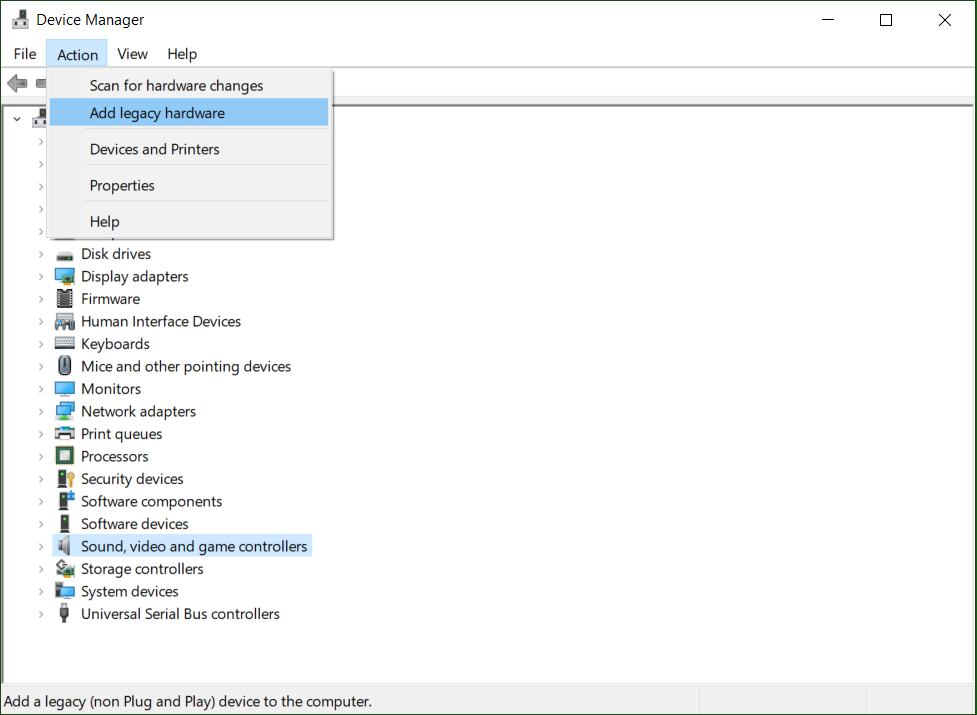
🎮 Step 2: Add Legacy Hardware
-
In Device Manager, scroll down and expand:
➤ Sound, video and game controllers -
On the top menu, click Action
-
Select Add legacy hardware
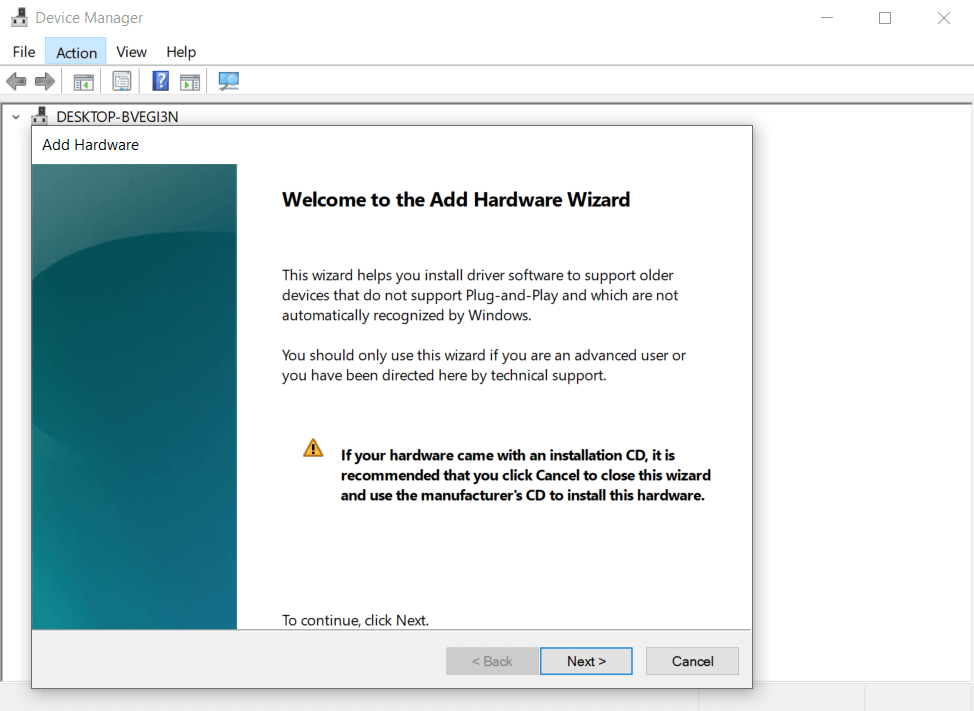
🧙 Step 3: Launch the Hardware Wizard
-
Click Next on the Add Hardware Wizard
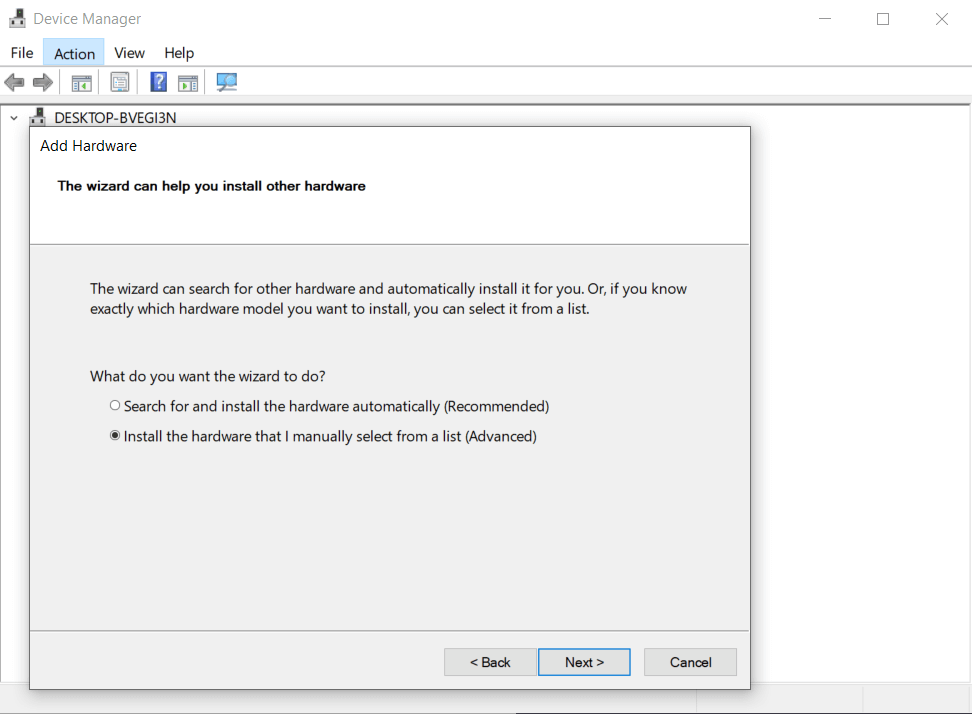
-
Select:
🔘 Install the hardware that I manually select from a list (Advanced) -
Click Next
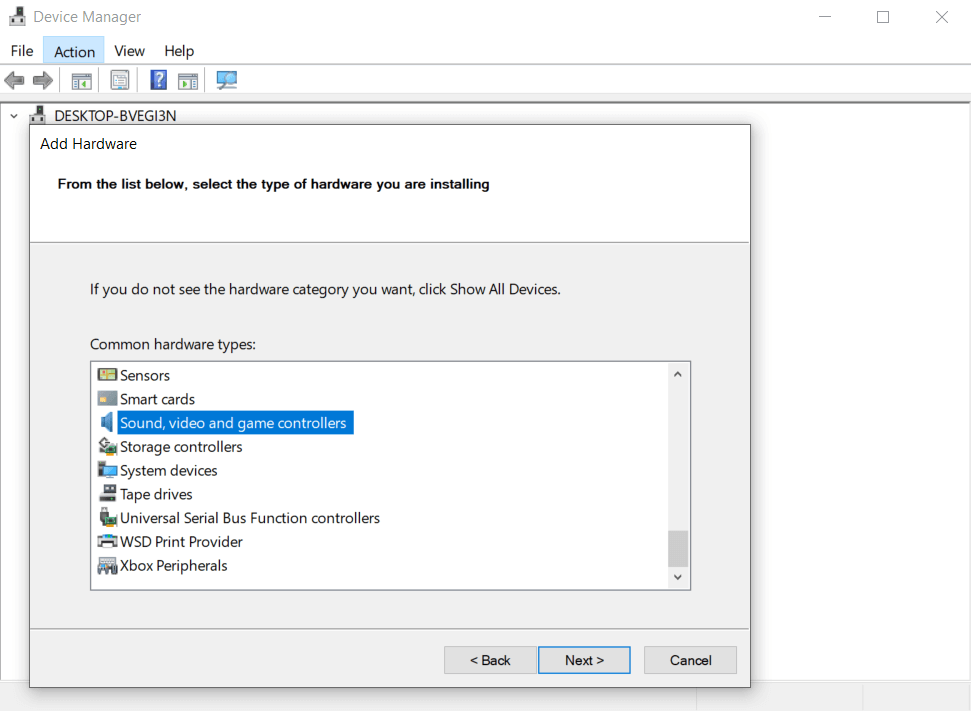
🔊 Step 4: Choose Device Type
-
From the device list, choose:
➤ Sound, video and game controllers -
Click Next
Step 6: Install the Voicemod Virtual Audio Device
-
From the list, select:
🎚️ Voicemod Virtual Audio Device -
Click Next
-
Follow the installation steps until complete
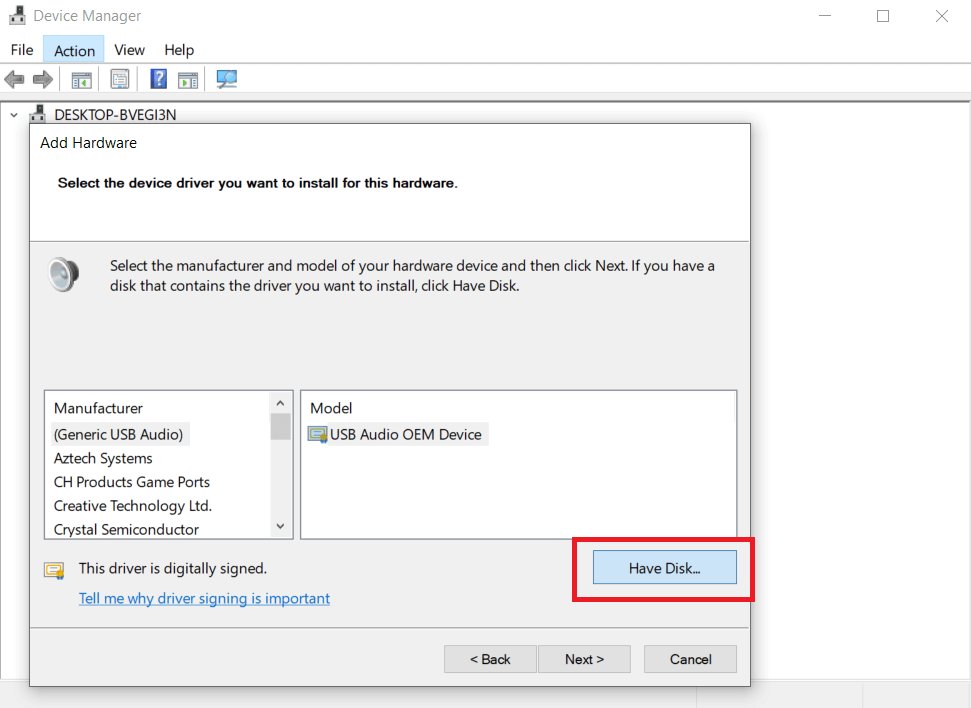
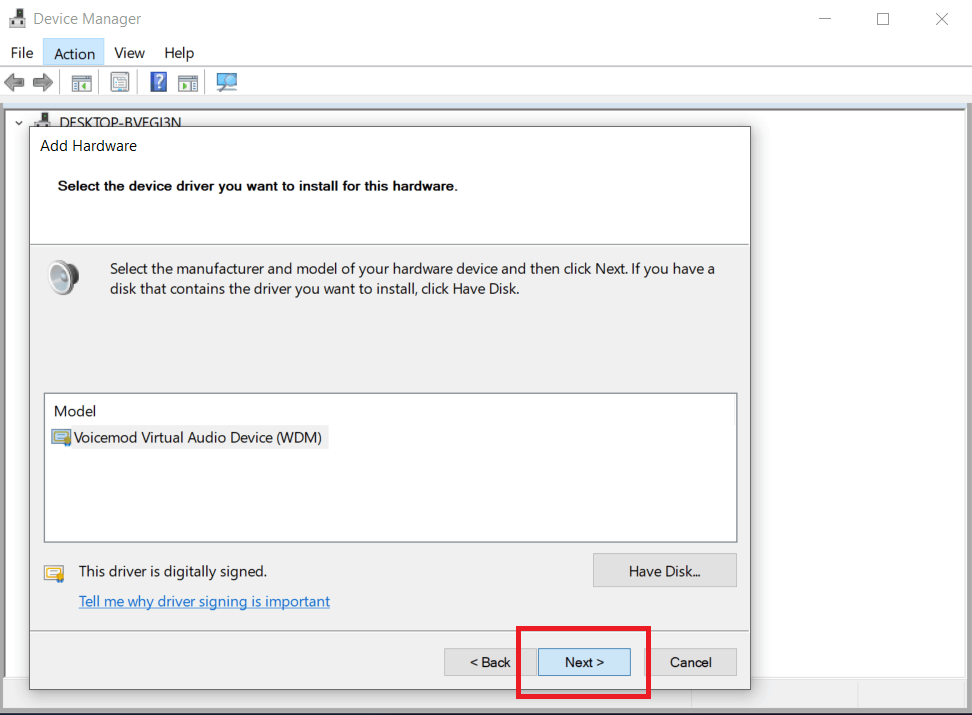
The subsequent window will retrieve a list of all the devices. Choose “Have Disk” option at the bottom of the window and click on Next.
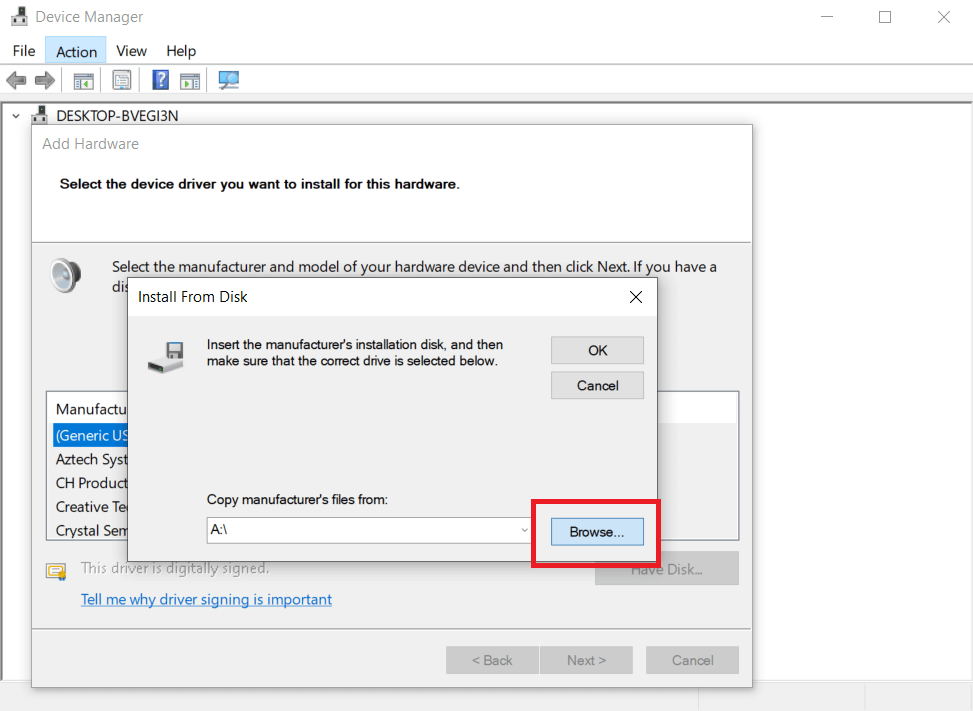
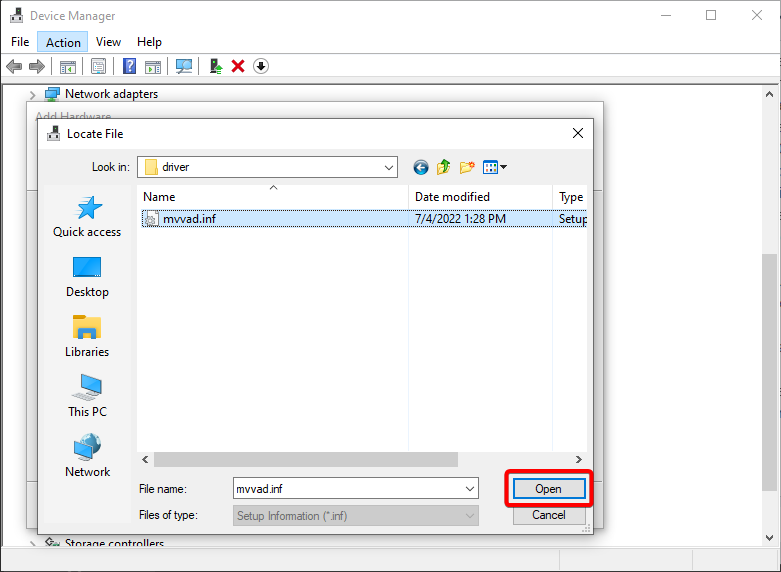
Click on “Browse…” to specify the folder where the driver files are stored.
Go to “C:\Program Files\Voicemod Desktop\driver” folder
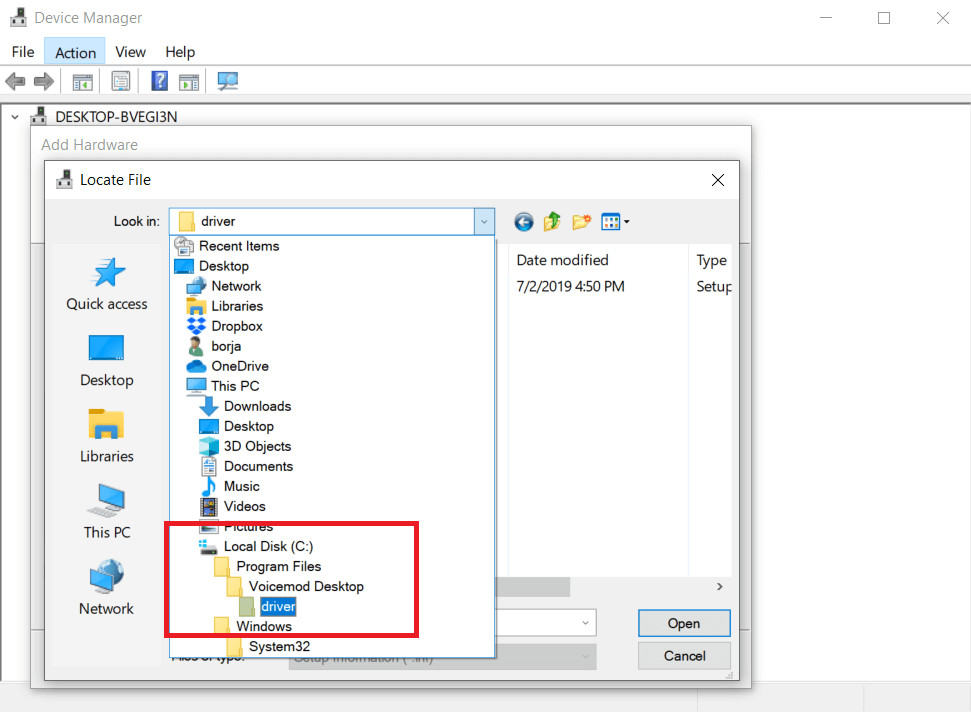
And select the “mvvad.inf” file and click on “Open”
Select the “Voicemod Virtual Audio Device” and click on “Next”
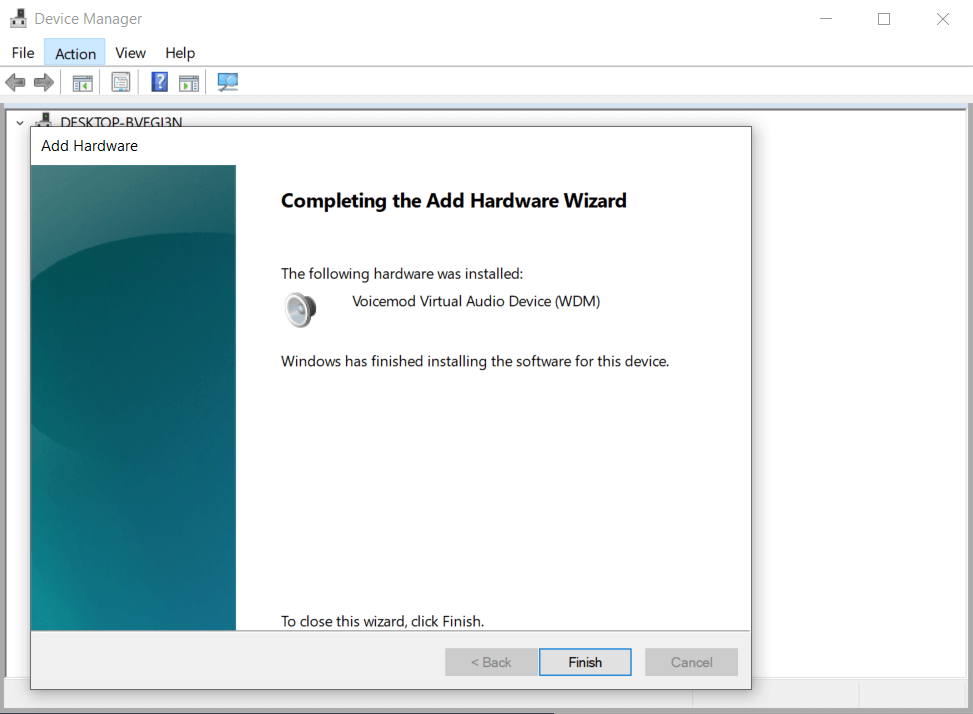
Continue with the installation process until the end and then click on “Finish”.
Now you can use Voicemod normally.
Need more help? Click HERE