If after uninstalling Voicemod you still have problems with your microphone and/or headphones/speakers, it may be because Windows has set another default device than the one you prefer.
Go to the Playback and Recording tab and check if your own microphone is set as the default one. In case you don't have it, set it.
*If the problem is volume, check the properties of your devices.
Another option is, for some other reason, Voicemod and its driver have not been properly uninstalled. In this case, follow these steps:
- Install again the latest version of Voicemod:
You can download it from here: https://www.voicemod.net/downloadVoicemod.php
- Close the Voicemod app:
- Go to the system tray on the right side of your Windows Bar (where the time is, the audio icon, etc...).
- Find the Voicemod app icon.
- Right-click on the icon.
- Exit.
- Uninstall Voicemod:
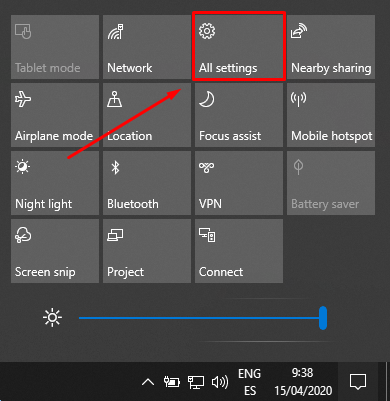
To uninstall Voicemod swipe in the lower right-hand corner of the screen (notifications) and tap 'All settings'.
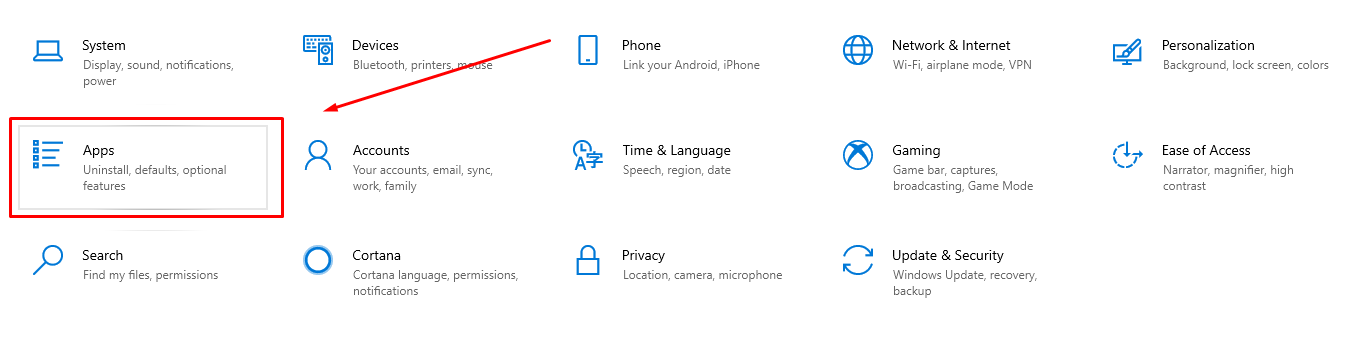
Select System and then tap Apps:
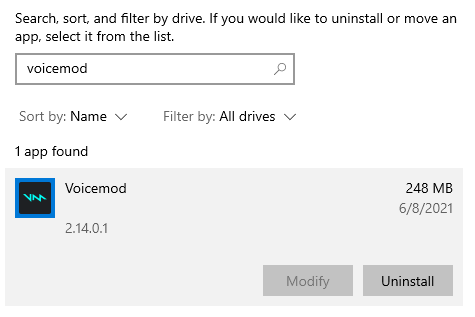
You can sort the list of apps by size, name, or install date. If you would like to uninstall Voicemod, select it from the list and then tap or click the uninstall button.
- After this, you'll have to accept that Voicemod can make changes to your computer to finish the process. Remember that you'll be asked if you want to keep your settings for future installations, in case you want to use our software again.
- Restart your computer:
To be sure that all Voicemod drivers are deleted restart your PC.
- After restarting Voicemod check again the default devices in Windows sound settings.
Go to Windows settings:
Select System and click on Sound.
And set there your default devices or open the Sound Control Panel to do it.
Need more help? Click HERE